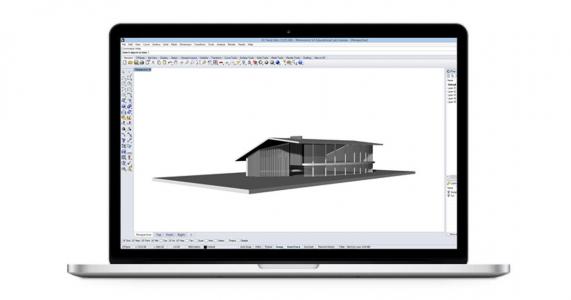
10 Useful Tips We Bet You Didn’t Know Existed in Rhino

- One-Shot Object Snaps
- The ‘TAB’ Direction Lock Key
- Schemes
- Advanced Selection Methods
- Selection Filter
- Home and End Keys
- Dot Command
- Using ‘PictureFrames’ as Background Bitmaps
- FullScreen Mode
- Blocks
- BONUS TIP! Capture an Image to File
Tip 1 One-Shot Object Snaps
One-shot object snaps are active for one ‘pick’ of a point only and override all current object snaps for that pick.To set a one-shot object snap, press ‘Shift’ and click and object snap check box to select the Object Snap that you require only.
After the point is picked, the original object snaps selected will reactivate.

Tip 2 The ‘TAB’ Direction Lock Key
The TAB Key constrains a Vector in any direction.Once you have made the first click within a command such as Line or Scale, press the TAB key before the second click to constrain the direction of the command to an axis between the first clicked point and the current position of the mouse cursor.
This tip works with any Rhino command requiring two points for direction input.

Tip 3 Schemes
Save and Restore Rhino Workspace settings as a Shortcut to your Desktop using a Scheme.Schemes include and save the following settings:
- Command defaults
- Dialogue box positions
- All Rhino Options settings including Aliases, Appearance and Colour, Mouse and Render settings and Shortcut Keys
- List of Recently-used files
- The Workspace toolbar and layout

Tip 4 Advanced Selection Methods
Dragging from right to left creates a Crossing Box (Dashed Lines) that selects all objects hovered over, regardless if the entire object has been enclosed by the selection square or not.Dragging from left to right creates a Window Box (Solid Lines) that only selects objects that are completely enclosed within the selection square.
Other Selection Methods include:
- Select Objects by Type (Edit Menu > Select Objects)
- Select Objects by Layer (Right click on the Layer and choose the option ‘Select Objects’)

Tip 5 Selection Filter
Click the Selection Filter tool (Edit Menu > Selection Filter) to select only particular elements in your model.
Tip 6 Home and End Keys
Click the Selection Filter tool (Edit Menu > Selection Filter) to select only particular elements in your model.Tip 7 Dot Command
Use the ‘Dot’ command to attach visible labels to your objects.You can use either the pre-numbered dots (0-9) or the type in the ‘Dot’ command which allows you to type your own text into the Dot.
This function can be found in the ‘Annotate’ toolbar.
Dots are always parallel to the View Plane and are the same size regardless of which direction the model is Rotated or Zoomed.
Unfortunately, Dots cannot be changed in Size or Text Style and are internal to Rhino only (unable to be exported).
NOTE: To type strings of text with spaces, enclose the phrase in quotes.
You can change the colour of the Dot by assigning it to a different layer and changing the Layer Colour in the Properties panel.

Tip 8 Using ‘PictureFrames’ as Background Bitmaps
PictureFrames can be a more flexible and powerful version of Rhino's BackgroundBitmap tool.Images are attached as Texture Maps to planes in 3D space and are displayed in Rendered Mode rather than being placed in the background of the viewport independent of geometry as with the Background Bitmap command.
Advantages of the ‘PictureFrames’ tool as opposed to ‘BackgroundBitmaps’:
- An unlimited number of Images can be placed in the model as opposed to only one with BackgroundBitmaps.
- PictureFrames can be viewed in all viewports rather than only one.
- You can Scale and Rotate PictureFrame Images as required as opposed to BackgroundBitmaps which align to only the Cplanes ‘X’ and ‘Y’.
- PictureFrame Images can be dimmed and altered to be more or less transparent.


Tip 9 FullScreen Mode
Use the ‘FullScreen’ tool to present a design.‘FullScreen’ fills the monitor screen with the active viewport and hides all menus, the status bar, toolbar, command prompt and Windows Title Bar.
Press ESC to return to normal view.
Tip 10 Blocks
One geometry is selected to define the block which can then be copied multiple times across the entire project.
To alter all of the repeated Block Instances at one time, only the one original Block definition has to be altered.

BONUS TIP!Capture an Image to File
The Rhino command ‘ViewCaptureToFile’ saves an image of the current view to a file.Depending on the File Type, the Image can be saved with a Transparent background.
To access the command-line options, type a hyphen in front of the command name: ‘-ViewCaptureToFile’.

If you would like to share your thoughts on our blog, we’d love to hear from you!
Get in touch with the ArchiStar Academy [dev] community via Facebook.
Posted on 09 Oct 2023
![ArchiStar Academy [dev] logotype](https://academy.archistar.io/images/archistarr-academy.png)
